I initially thought that I would need to tear the diaper apart to get snaps "inside" the pocket, and therefore I was cranky, because the principle was that if I have to tear apart a diaper and put it back together to make it function, then I should just make my own diapers. So I just purchased the diaper aplix and was preparing to do that today, when I thought I would just do a little more research on converting. Come to find out, with an industrial snap press, I would NOT need to take the diaper apart to get it converted... So tonight I converted the oldest of my batch... the blossom pink one. I hadn't used it since Marek was born, because it had such bad aplix, I had removed the tabs to see how difficult that was going to be (months ago!) and had then ordered the aplix.... and so it just never got used. And since it was the oldest, was torn apart, and was Pink, I figured that if I botched it, I wouldn't be so upset. So tonight I converted it to snaps.... and I LOVE it! Now Marek is wearing it to bed and we will test my snap placement, and if all is well in the morning, I will continue replacing the aplix with that snap placement. Tonight as I watch the recent episode of Eastwick on the laptop, I am removing the front Aplix strip on the other 7. Once I get all those done, I think I will also convert my new 6.... because I have heard that if you convert them when they are "new" they never wear like those with aplix do.... and they last much longer. Yay!
So here are a few pics.
Here are my first 8 with the laundry tabs removed

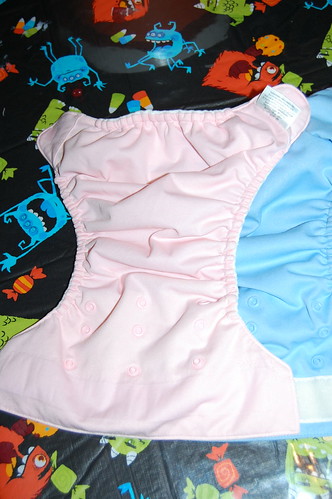
Here is the blossom diaper with the front aplix strip removed, getting ready to convert!

I made myself a template. I have two rows of snaps on the front, all placed .75 inches apart, 12 snaps per row. Then I decided to go ahead and do 4 snaps on the wings, .75 inches apart, so that they are harder for an older toddler to remove, and are sturdier.

I traced the diaper front onto a piece of tracing paper, then lay the paper over a quilters ruler to make my grid for the snaps. Then I lay a snap on top of my markers to make sure i liked the placement. Once I had my template, I poked or punched the holes in my "pattern" and used a fabric marking pen (you can use a pencil) to mark my snap locations. Here's my marked diaper ready for conversion.

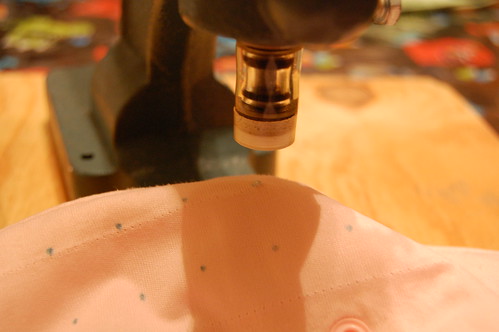
Then I reached inside the pocket and poked the snap cap up through the PUL (there are two layers in a BGOS 3.0 because of the OS snaps in the front) and then I attach the stud or socket with my industrial snap press. The cool thing, that I never really realized or thought about, was that I didn't have to try to feed the snap press into the pocket in order to set the snaps. I could set the snaps right through the bottom fabric layer (PUL and Suedecloth) without having any issues. It worked so smoothly!

I use size 20 Industrial Polyacetal snaps. I just used white on my older diapers, because I am having a hard time finding matching snaps, and I have a TON of white ones that I should really just use up. I may use colored ones on the newer 6, as I have some snaps that are pretty close to matching.
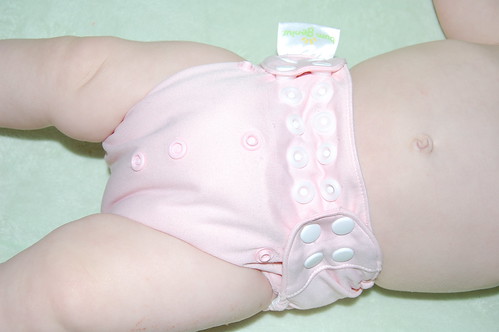
Here are a couple of photos of the finished product:


And here is one on my model, an 18lb 6 month old.

I am testing it as we speak. Can't wait to convert the rest if I am happy with this conversion. I will test how long it takes to apply snaps once I have gotten through the first one and around the learning curve and the process of making my template, etc. :)
Questions let me know!
Read ON for Part Two of this post: How many snaps, caps, sockets, studs per diaper and where to order snaps that match BGOS, and also how much it will COST you to do the conversion.

No comments:
Post a Comment