Showing posts with label Cooking with Kids. Show all posts

Wednesday, June 16, 2010

Dinner in 29 minutes or less? Reviewing the Pampered Chef Deep Covered Baker

I do want you to know, that despite the fact that I was a Pampered Chef consultant for 3 years, this is a completely un-biased review ;)

At a recent Pampered Chef show I hosted, I got a ton of cool kitchen gear. I can't remember if I shared pics here or just on Facebook, and of course now I can't FIND the pics. But anyway, I digress. I got the Deep Covered Baker, which is a $69 glazed stoneware piece, and I adore it. I also got one of the "29 minutes to dinner" cookbooks (I already had the other one but hadn't made anything out of it yet) and the quick little recipe cards, I think they are Dinner Done with One meaning a one pot recipe. Anyway. The baker was on backorder because it was so popular, and so I received it in mid-May and then while camping over Memorial Day weekend I planned some meals using the recipes that would work in the baker. I got groceries for all the ingredients... and this week I started. We have had three meals in the baker, and so far I have had a great experience. Let's break this down by recipe!

Easy Tortellini Toss- Weekday Dinners, Done! Recipe Card Collection
This recipe calls for simple things like a slice of precooked ham (think the big oval ham slice that has a bone in it, and is wrapped in plastic) frozen cheese tortellini, and fresh spinach. Then you add garlic, flour, butter, milk, parmesan, pepper, and chicken broth to make your "sauce." It's really really quick and awesome tasting. What's great about many of these recipes, is that while the one ingredient (often the meat) is cooking in the baker, you are prepping and combining the other ingredients. Then you often add everything to the baker and cook together for another short amount of time and you have your meal. The tortellini toss was a HUGE hit. I will definitely make it again, although next time, I will probably double it, because it would be nice to have leftovers of, especially for the kids' lunch the next day.

Orange Glazed Sticky Ribs- 29 Minutes to Dinner Volume 2 (cookbook)
This recipe was a completely new experience for me. In the 12 years that we have been together, I have never made Ribs. Ever. I have never made ribs in my life. I had only EATEN ribs for the first time about a year ago. I, as a rule, do not like BBQ sauce, and because all the ribs I have ever seen are BBQ, I have avoided slathered up ribs like the plague. I had an interesting time picking out Baby Back Ribs at the store. I was excited to try. I love how these cookbooks have a neat little blurb on the righthand side of each recipe that tells you a little bit about the ingredients (especially if they might be something you have not used before) and gives you little tips about the recipe in general. I always learn something from them. The tips are titled "Chef's Corner" and this recipe described how to remove the membrane that is under the rack of ribs, which I didn't even know EXISTED. This was the most difficult part of the entire recipe. That and the fact that ribs smell TERRIBLE when raw and when cooking. And remember, you are talking to the girl who spent her college years touring slaughterhouses and packaging facilities, and being surrounded by butchers and fresh hanging meat. I don't understand why the ribs smelled so terrible, but my husband agreed. It was almost bad enough that I couldn't eat them.... almost ;) I rinsed the ribs THREE TIMES with cold water to try to get some of the smell to go away. Ick.

Basically you remove the membrane, separate the ribs, and cook them in the baker. This is the recipe that I ran into trouble with cooking times and meat temperatures. Because my mom is in food service and has a sanitation license, I have learned to be a stickler for how well my meat is cooked, and to check temperatures. Using TWO different quick read thermometers *one by Pampered Chef and one NOT by Pampered Chef* I repeatedly tested the meat's internal temperature while continuing to microwave the ribs. I had to nearly TRIPLE the cooking time that Pampered Chef recommended before I got the internal temperature to 160 degrees. This made me nervous, especially with the smell of the ribs. The last thing I wanted to do was poison us.

The glaze consisted of Orange Zest, honey, apple cider vinegar, spicy brown mustard, garlic, salt, and cayenne pepper. The ribs were also coated in cayenne pepper, and I *may* have overdone that part as the ribs were awfully spicy (but certainly DELICIOUS!) My husband ate a ton of them and even the kids ate them. Marek's entire forehead and around his eyes turned red with the heat of the first few bites. When I look back at the recipe, it says to use 1/2 tsp to coat the ribs and I think I missed that part because I just picked up each rib individually and coated it with cayenne. LOL. No wonder they were hot!

The recipe calls for Cole Slaw, but I despise slaw, and the kids don't really eat it either, so I made Fresh Buttered Asparagus (which I also steamed in the baker- YUMMM!) and Angel Hair Pasta. This recipe was a huge hit. The prep was actually lots of fun, because I love recipes with zest and I especially appreciate any excuse to use my Micro Grater. I adore that thing. The coolest was explaining to Ardyn what Zest was. She climbed up on her stool and I described how an orange has a peel and when you rub the orange across the grater, it shaves off the peel and the fine pieces that result are called Zest. She was thrilled.

Overall, a great dish, we WILL make this again, but I was only upset by the tripled cooking time of the ribs. It still only amounted to about 28 minutes of cooking time, but the recipe is supposed to be start to finish in 28 minutes, and I don't know if the problem is that my microwave isn't brand new or what. I also wasn't a huge fan of having to grill the ribs in the grill pan after already cooking and glazing them in the baker... but the result was awesome. To me it was just another dish to dirty, and I was trying to also get side dishes made (since I didn't like the slaw) and so I had Evan come in and do the grill part for me while I proceeded to the sides.

And aren't they pretty?

Glazed Teryaki Meatballs and Noodles- Weekday Dinners- Done! Recipe Card Collection
This was a great recipe. Ardyn's favorite part was rolling meatballs. It was great for her hand eye coordination, and she was so pleased with herself. She counted them as she made them, and was so excited to actually eat them. There were a few things about this recipe that I did not like, and that I will change next time I make it.

For starters, you make your meatballs- egg, bread crumbs, raw ground beef, onion, and Pampered Chef's Asian Seasoning Mix (which I happen to have.) This is all fine, but it takes TWO TABLESPOONS of Asian Seasoning Mix. This is a large amount in my mind, especially considering the price of the seasoning. Evan thought the meatballs were too spicy, and while the kids and I seemed fine with them, I think that next time I could cut that amount almost in half and still be satisfied. The second thing that I wasn't thrilled about was the "prepared teriyaki glaze" in the recipe. I wasn't sure if I was supposed to MAKE that, or BUY that... but I decided that I would just get the bag of stir fry veggies that comes with the frozen pouch of teriyaki. that worked fine. Except I think there wasn't quite enough. I think there was enough in the pouch, but I don't know that it was really enough to coat the noodles and veggies to our taste. The other thing was that I couldn't find veggies with teriyaki glaze unless there were lo mein noodles frozen in with them. I didn't really realize that at first, but when I was making my spaghetti noodles (which were to be substituted for the lo mein noodles that you would traditionally find in a chinese recipe as such) I was disappointed in how sticky they were. They weren't coated with enough teriyaki, and I had to dirty TWO More pans in addition to the Deep Covered Baker in order to boil the noodles and then "fry" the noodles with the garlic and the sauce. So you are looking at FOUR large dishes/stoneware/cookware items that are dirtied, plus your measuring cups, and the food chopper.... I was not thrilled with the "ease" of this part of the recipe. If I were to do it again, I WOULD buy the Lo Mein noodles with the frozen stir fry veggies and the Teriyaki packet. I would then cook the whole thing in the baker (meatballs first, then add the veggies/noodle mix and the glaze) and avoid the spaghetti altogether (both for the mess, the ease of prep, and for the fact that the Lo Mein noodles taste better anyway!) I would ALSO be sure to cook the meatballs thoroughly before adding the veggies to the baker. The recipe calls for cooking the meatballs alone for 5-7 minutes until the outsides are browned, and then to add the veggies and cook the whole thing 4-6 minutes until the meatballs are done to 160. Well, I did 7 minutes, and then another 6 minutes, and although they browned on the outside, after that time the veggies were done, but when I checked the meatballs (especially those on the inside of the baker) they were not even to 100 degrees yet and the insides were still pink. I cooked them for another 12 minutes on high before they were DONE inside and by then the veggies were a little overdone. I don't think that was the best way to do the recipe. Why not make sure the meat is completely finished before adding the veggies? 4 more minutes on cooked meat isn't going to ruin the dish, but having to put the veggies through 12 more minutes of microwaving certainly could ruin them.

So, overall the recipe was delicious but could use some tweaking and again- some longer cooking time for the meat. My microwave is a Kemore, it is about 9 years old, and it does have a turntable. I have never in any other recipes had an issue with cooking times, but have been consistently having issues with the meats in the Pampered Chef recipes that I have been testing out.

The baker was overall a very awesome purchase. I have stressed to my husband that I want to take exceptional care of the baker, being sure that it is hand washed immediately and that it is not dropped or chipped, because not only does it cost $69, but it is now a hostess ONLY item and so therefore I could only replace it if I hosted a new show (or checked eBay!)

I have also had the Rush Hour Chicken Fajitas in the baker, but because I didn't personally make them either time, I can't exactly review the recipe except to say it was easy looking and delicious. :) More to come perhaps, as I have several more to try!

Saturday, May 15, 2010

Review: Little Beetles "Little-To-Big" OS Organic Wool Cover (snapping)

Well, long long ago, in the land of diapers (that's my house, dontcha know?) I was looking for some wool that was gender neutral and would work for both kids, but was unaware that such a fabulous thing existed. I came across the news that Little Beetles had JUST released a new cover, the Little Beetles OS Wool Cover.... and that it was available in snap or aplix! How cool!!! I was so excited! Marek was still a newborn (ish) and Ardyn was just starting to do some potty training, so I was wary about dumping a chunk of change into anything, and this really was a chunk of change at near $40 for one cover. But in the name of research, and of finding what might be the perfect solution, I bought one, back when I also bought two pair of little beetle learners- training pants for Ardyn.

When it arrived it was SUPER cute. I promptly hand washed and lanolized it (according to directions, don't fear, this isn't my first pony ride.) Then I decided to start trying on the babies!

First I started with Ardyn, because Marek was sleeping, and he was still not quite 2 months old...

It was a really good fit for her. She was wearing 24 months or 2T size and this picture was taken when she was 20 months old and just beginning potty training. I liked the fit overall, and it was trim and I could see wearing it under clothing. These pics are over a Goodmama fitted, so it adds some bulk of course.

Little Beetle One Size Wool Cover

Little Beetle One Size Wool Cover

Little Beetle One Size Wool Cover
I love how nice and trim it looks from the back. Fast Forward two weeks and Marek was almost 2 months old, and I decided to try it on him. I had used it about 2 times on Ardyn, because she was PLing it really wasn't necessary because I had her in trainers almost full time.... but she did wear it overnight once just to test, and there was no leaking whatsoever. Very nice.

Well, per most OS covers, well, really most OS diapers in general, it fit Marek, but was WAYYYYY Bulky (he was after all, still young- not quite 2 months old in fact, it was May 2009.) I knew that he wouldn't be wearing it under ANYTHING and my main goal was to also find a wool diaper cover that was smooth and thin enough to wear under clothes. This was a no-go for someone still so small, but honestly I was not surprised. Here is a pic of him in the cover- Basically it was a try-on session and we took it right back off. :)

Marek in a Little Beetle One Size Wool Cover

One thing that I really did NOT like was the way the snap configuration was on the front to allow for wing overlap. It didn't seem to lay right no matter how I tried, and I am a wing professional, especially since we've been using Goodmamas for 2+ years. I don't quite know why the wing overlap is wonky, but it added unnecessary bulk that was not only unattractive, but confusing.

Overall, I knew that when Marek got bigger, I would like the cover. So we used it about 4 times, had only washed and lanolized it that one initial time.... and then a few months later I pulled it out when Marek was wearing Goodmamas consistently and I felt he would fit the OS cover nicely. And he DID! So we tried it on, and it was great! I was so excited, and then the next time I went to put it on..... What's this? SERIOUSLY?!?! The fury. The sadness. The regret. The LEG ELASTIC!!! OMG you are kidding me. The leg elastic in one leg had completely given out. I was SO upset. How does a $40 cover get washed by hand once and worn a max of 5 times, and then have no leg elastic left? By this point in time, my 30 day "one wash" warranty was over by about 5 months. What a horrible experience!

I don't know what caused this, perhaps I purchased a lemon? It was when the covers were first released. I kept meaning to call the company, but it was one of those things that got put on the back burner, and so now I have this EEEEEUC like new, barely touched, beautiful, soft, bulletproof, organic, one-size, snapping, LOVELY wool cover.... with elastic in one leg. Well. So much for good ideas on my part.
Little Beetle OS Wool Cover

Little Beetle OS Wool Cover

I look forward to hearing experiences from others with this cover. I am unsure if the leg elastic issue is isolated to me, or if it happened to anyone else, but it made me very sad. I keep telling myself that I will just rip the seam open and peek inside, to see what type of elastic is in there and try to determine what happened..... if I ever get to that I will try to repair and let you know what I find by updating this post!

So, I really wish I could provide a better review on the quality and longevity of what I initially thought was a great product, but I just can't give this one the stars that I so desperately wanted to.

Tuesday, February 16, 2010

Photo Tutorial- Homemade Bird Suet- a Great Project for Kids!

For the Love of Birds :)

Well, since we all kinda have those February Blah's, we decided to do a fun project that was a little bit different (Ardyn doesn't get to cook much, except in her play kitchen) and I have to say that per usual, she is over the moon about being in the kitchen with mom. She really enjoys it, but I have a hard time finding too many things that are safe for a 2 year old... The best part about this is that the measuring doesn't have to be accurate at all for birds to find it delicious... the ingredients are simple and inexpensive, and we have them all on hand... and the cooking is minimal and the heat on Low. Plus, Ardyn has had bird feeders right outside (and ON) her bedroom windows since she was not even a year old, so she loves to feed the birds and watch them. Suet cakes aren't really expensive, but every little bit of homemade can help!

So to start, we donned our aprons, and got our recipe and our supplies/ingredients all set out. Ardyn helps me cook on a stepstool/chair that our friend Nancy Anderson bought for us loooooong before we even moved in to the house, at Michael Jon's grandma Michlig's sale. It was cheap and she said that everyone needed a chair/stool like that (and we REALLY do because we have some cupboards that are so high you can only reach them if you stand on the stool.) It's great for Ardyn to help, and puts her at counter height, plus it has two steps for easy up and down!

Here's Ardyn ready to go with the recipe. She LOVES recipes. Grandma Deb gave her a "recipe box" for her play kitchen this Valentine's Day and she hasn't let it go since yesterday when she got it! Her favorite Strawberry Shortcake episode is "cookin up fun" and she really loves recipes.


First, measure out 1 cup of shortening. We use the cheap stuff from Aldi's and measure it in our mini-measure-all cup. Ardyn held the cup and I used a mini-spatula to scoop and fill the cup while she held it. We added it to the saucepan, I held the cup and she pushed the plunger and squealed with delight when the shortening "plopped" into the pan.

Measure out 1 cup of peanut butter (this time she insisted that she needed a few bites herself.) A little stickyness adds to the fun.

Melt the shortening and peanut butter over low heat. We stirred it with our Pampered Chef Mix n scraper, which is heat safe, and helped to get the sides and bottom of the pan well scraped. Ardyn did help stir. I explained that the stove was hot and that she needed to be very careful and she did well. Stirring put the BIGGEST big girl smile on her face!


Add 1 cup of flour and 3 cups of cornmeal. To make this part more fun and make it educational, I use a half cup scoop and that basically doubles the amount she gets to measure, and we count together how many scoops of each we are adding. This also really helps with what she can handle, as the cup is a little heavier and more awkward for small hands than a 1/2 cup. She held the scoop over the pan, and I poured from our Tupperware Modular mates Ovals and Super Ovals that we store our baking ingredients in. It was nice because the measurements don't have to be so exact, so if she moves the scoop or we spill, it's no issue!

Stir to combine.... it will be a thicker consistency obviously, and a little grainy looking. Think Cream of Wheat or Malt O Meal :)

This is MY favorite part. This is where you start dumping in the good stuff. Bird Seed and Seed Mixes, Nuts, Berries, Rolled Oats, whatever you desire. Since I am cheap, I use an inexpensive bird seed mix, and I think Next batch we might add rolled oats. We will see what the birds love to eat! We just add and stir, add and stir, until we feel we have a putty like consistency that will still pour or at least plop out of the pan. Ardyn is pretty excited that it really looks like bird feed now!


There are LOTS of ways to form your suet. If you save those little plastic trays that some store bought suets come in, you can add the suet to those to make perfect little squares. Another alternative is an 8x8 disposable baking pan, or even a silicone pan so you can twist and release. We happened to have an aluminum one on hand from a previous project, so I lined it with wax paper (so it would release easily and so we could use it for future batches/projects... you know how we are about reducing and reusing around here) and then we poured the suet mix inside and spread it evenly with our spatula. Once it cools, we can slice it into four perfect squares, which will be the 4x4 suet cake size of most store bought suet cages (which we already own... so it's perfect!) We also plan on using plastic party cups (think keg cups) in a future attempt, which will much mimic the bell type of suet cake... just add ribbon, string, or twine in a loop, which you can embed into the cake via the open top of the cup before the suet dries.


Since I didn't feel like contacting Wyanet Locker looking for real suet, and then bringing it into my house and letting Ardyn smear her hands in it, we used the lard/peanut butter alternative that birds seem to love just as well. Once it cools, we will be in business for bird watching!


Printable Directions:

Homemade Bird Suet
•Melt 1 cup shortening (or lard) in a saucepan on very low heat.
•Add 1 cup peanut butter and stir until melted.
•To this add 1 cup plain flour and 3 cups plain cornmeal. Mix thoroughly.
•Add whole rolled oats, seeds, raisins or bread crumbs if you have any. The final consistency will be putty-like.
•Pour into a disposable 8 inch by 8 inch aluminum pan and allow to cool.
•Slice into quarters; each one should fit nicely into a suet cage, available at most garden centers.
•Store remaining squares in the refrigerator.

Monday, September 21, 2009

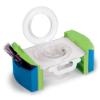
My Review of Travel Potty

Originally submitted at One Step Ahead

Our portable potty is so compact, a child can carry it! This potty-in-a-briefcase is very easy to set up and fold down. Perfect for takin' care of business on the road. No cleaning required: just secure a one-gallon zipper bag to the seat for fast, neat disposal. With carry handle, support hand...

The BEST! We use it EVERY TIME WE LEAVE!

By dazed81 from Illinois on 9/21/2009

5out of 5

Gift: No

Pros: Lightweight, Easy Setup, Comfortable, Convenient, Easy Use, Portable, Durable

Best Uses: Camping, Daily Use, Kids, Toddlers, Travel, Keeping in the Van

Describe Yourself: Parent of Two or More Children

This is THE BEST potty training item I have bought. It is PERFECT! I love that it can use gallon ziploc bags (available EVERYWHERE) and that it allows you to zip up a mess and dispose of it easily, or if there is nowhere to dispose, you can keep it with you in your vehicle until you get somewhere to dispose. We initially bought this for camping. We kept it in the tent so that she could go overnight and go easily without walking to the nearest restroom... because we knew that she wouldn't make it. It was WONDERFUL.
We discovered that it is great for in the van, and we never go anywhere without it. It allows us to stop if she needs to go, and to go whenever we get somewhere (immediately if necessary!) It also is great to use in the great outdoors. Because we live in a very rural area, we can use it in the grass without a bag and it's quite convenient.

It's simple to setup. When we recently went to a hayride, I just set it up each time she needed to go, alongside the corn field. It was excellent! Without this, we would most certainly have more accidents. I attribute it to our luck with early potty training. my daughter just turned two only a couple of weeks ago, and has already been potty trained for over a week! Yay!

I would recommend this to EVERYONE!

(legalese)

My Review of Body Silk Seamless Nursing Bra

Originally submitted at One Step Ahead

Finally: a truly comfortable (and flattering) nursing bra! This seamless, butter-soft Bravado nursing bra molds to your body for a perfect fit, and the stretchy fabric grows and contracts to support your changing shape. The cups unclip with one hand and may be fully lowered when nursing, as recomme...

THE BEST NURSING BRA! I own five!

By dazed81 from Illinois on 9/21/2009

5out of 5

Gift: No

Pros: Nice Pattern, Good Size And Fit, Soft, Easy To Wash

Cons: Stains Easily

Best Uses: Newborn, Toddlers, Preemies, Nursing Moms, Infants

Describe Yourself: Breastfed two children, Parent of Two or More Children

I have five of these bras. I purchased them at a local bra specialty shop and was professionally measured as a 40G. because this bra is microfiber and adds LOTS of stretch, it was recommended and was the most comfortable bra I have ever tried, and I have tried A LOT of nursing bras, alot of different styles, brands, etc.
I was advised that it is not a good idea to wear the same bra two days in a row, because it is hard on the elastic and doesn't allow it time to regain it's shape. I purchased two and went back to buy three more because I loved it so much.

The ONLY downside that I see is that after a long day, the bottom band (which is Really nice and soft, but still wide) can be curled up a bit from all the weight.

These wash nicely. I use the handwash cycle on my washer and some unscented specialty lingerie soap. I hang them dry.

I love that these look so smooth and seamless and are very nice under all types of clothing. The only thing I can't wear them under is a lower cut blouse, or something with a really wide neck, because the straps and front of the bra may show.

I actually can release these straps with one hand, and re-hook them with one hand.

The bra has built in "pockets" and removable "padding" that can be used to help conceal nursing pads. I used these initially, but once my milk supply is regulated I don't need nursing pads anymore, and it was nice that I could just remove the bra's padding. Very nice quality.

Very pleased. I have had the same five bras for 6 months now with not a single issue.

(legalese)

Related Posts with Thumbnails