
This tutorial is for sewing goddesses who will be able to piece this together in their mind if I give them a brief description of my measurements and steps. I meant to take pictures while sewing, but since I was throwing it together from scratch myself, and had no pattern or tutorial to follow, I was (stupidly) too worried that I would make mistakes and not have the steps correct to make a full picture tutorial.
So.
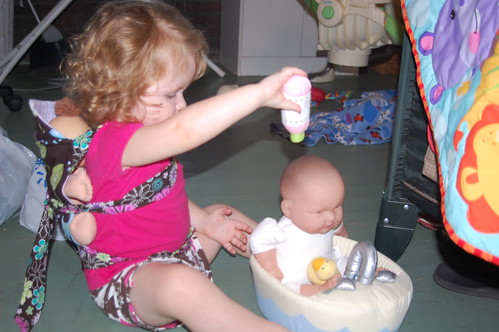
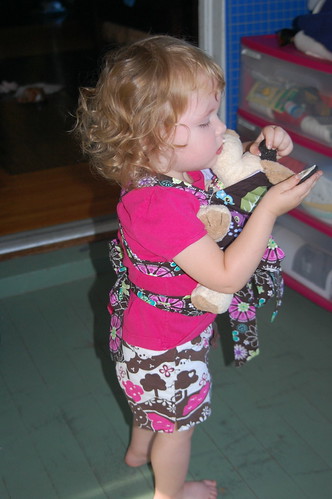
I wanted to make a baby carrier for Ardyn, so that she could carry her dolls and animals around like I carried her, and like I wear Marek. I didn't like the idea of a doll sling because I don't think it's secure enough for the babies to stay in with all the wild and crazy Diego-inspired adventures she partakes in on a daily basis.... plus I thought the Mei-Tai would be so stinkin cute. The Babyhawk is by far my favorite baby carrier, and at $119 for a custom reversible babyhawk, it had better be. I also have 2 hotslings, a Mayan Ring Sling, and aMoby (which I also really like, except it's HOT to wear) and an evenflo carrier. I wanted to mimic the functionality and pretty design of my babyhawk.
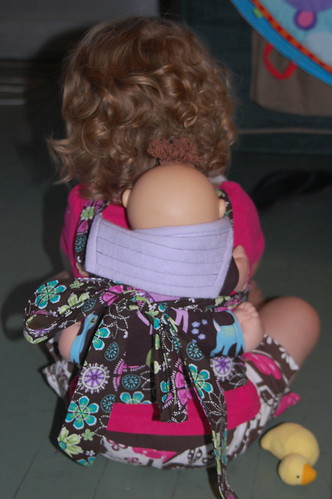
So, Ardyn is a 2T, with a 19" chest. I decided to just start measuring her and use my instincts to create my size. This is what I did. YOU will need to measure your child and alter the pattern accordingly if you think this size is not going to work for you. I did find that Ardyn prefers to wear her dolls in the back, so she can stuff Oreos in her mouth without getting crumbs on the doll (I struggle with that myself, LOL) and also because she has poor depth perception and seems to trip on things that she can't see when she is wearing her baby in front. (She IS my child!)
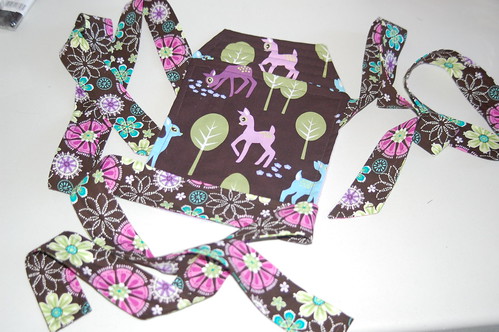
I started with the following:
1 Waist Strap- measuring 44" long x 4.5" wide
2 Shoulder straps measuring 44" long x 4.5" wide
Outer Bodice (Body of the carrier, not including headrest) 10 x 10" square
Bodice Lining (I used a pretty flannel) 10 10" square
Outer Headrest- 9" wide by 4.5" tall
Headrest Lining (same flannel) - 9" wide by 4.5" tall
PADDING for inside headrest (optional. See info in directions)
Now. I also used contrasting fabrics for the straps and the body. You Could use contrasting fabrics for the headrest and lining, or just coordinating.... whatever suits you. You could also put a pocket on it, like the babyhawk, but I have found that even though I paid a BUNCH extra to have TWO pockets (one on each side) of my reversible babyhawk, I really don't use them because we don't use disposable diapers, and because I like to tie the shoulder straps around baby's back instead of under his butt, to give me more mobility and support a younger OR heavier baby. Tying the straps around the back pretty much limits the pocket access.
I could have made the shoulder straps longer in proportion to the waist strap, but I didn't want her to pee on dangling straps (potty training, ugh) or trip on them.... also, having exactly 1/2 yard of fabric at 44" wide, it worked out perfectly to use my fabric at maximum efficiency. Because my fabric is not used for draping, or weight bearing (this is a TOY carrier) I didn't pay any attention to the selvages or grain of the fabric, I just maximized it's use because I was using Michael Miller Fabrics that are pricey and I ration them as it is.
I wanted a "padded headrest" because I like that it will mimic the babyhawk style mei-tai, and so I grabbed a microfiber automotive towel that I had laying around (get a whole bag cheap at Wal-Mart) because I use them as absorbency in my cloth diapers and trainers. I just cut TWO rectangles the size of the headrest and used it to sandwich between. I will get to that later....
My "finished" Bodice is 8.5" wide x 9" tall without the headrest. I expected it to be 9x9 but I had a sewing error and had to trim and re-do, so it actually works just fine either way.
Step 1. STRAPS:
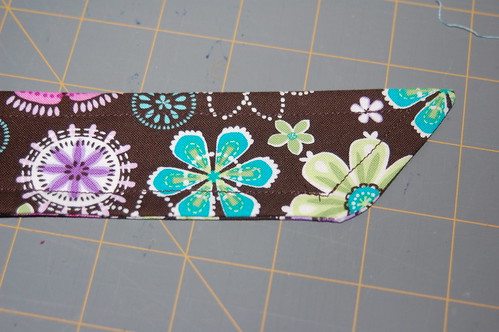
Fold each Strap in half lengthwise, with right sides together. Serge (or sew, your preference) the long edges. on the SHOULDER STRAPS (2 of them) serge or sew ONE END closed at an angle, forming a point (looks nice and pretty, professional, etc.) If you serged, put some Fray Check on the 2 corners where the serging meets and at the "point". I suggest leaving both ends of the waist strap open so that you can close them as the final step, after you have attached to the bodice. This allows you to try it on the child and take off any excess length to prevent tripping!
Turn the straps rightside out. I then press with an iron, and topstitch each shoulder strap.... so that they look finished and lay flat, like so:
Step 2. HEADREST:
This is designed to be flipped up or down depending on the age of your baby and their head control, or depending on their status (awake or asleep!)
This was my favorite part. You could leave it out altogether as it is purely eye candy for a doll carrier. But I love it just the same. Okay, so I started by angling the ends of the headrest layers, so they looked just like the headrest on my babyhawk (which was in the van, so I couldn't even LOOK at it! Just from memory...) I just used my rotary cutter and a olipfa ruler (strightedge) and my cutting mat. I eyeballed it. I don't know the measurements. Use your judgement (I know some of you hate me for saying that. Sorry!)
Then I put the lining and outer fabric together (good sides of the fabric facing) and serged (or sew) the top and sides together. I put fray check on the corners. I turned it rightside to. I pressed with my iron. Then I cut the Microfiber layers for my stuffing, identically to the headrest pieces, but 1" shorter on length and width, so that I could "stuff it" inside the headrest pieces. Once I had it all inside, I topstitched the headrest with the microfiber inside, and stitched at 3/4 inch-ISH intervals to mimic quilting (as in my real carrier) Voila- Finished Headrest. Nice and cushy!
Step 3. HARD STUFF!- attaching the headrest!
This is where things start to come together. Very gratifying, but confusing and not sure how I will describe this without pictures. Oy. Okay I lay out the two bodice pieces wrong sides together so it looks just as it will when finished... and I put the lining piece face down on the table. Then I lay the headrest piece on top (meaning ABOVE the bodice on the table, like it will look when assembled), with the lining facing down against the table, like my bodice pieces. Now I use my common sense and sewing experience to determine that I need the headrest to be sandwiched between the bodice outer fabric and the lining, with the narrowest "top" edge of the headrest down INSIDE (between) the bodice layers. This is so that when I SERGE the top seam of the bodice, I sew the headrest inside it, and then when I turn the bodice right side out, the headrest "pops out beautifully" and is all inside the top seam of the bodice.
This is something that you either know how to do, or you don't. I learned all about it in high school home-ec when I put the arm on my teddy bear, backwards, about 4 times in a row until I wanted to cry. Now, I finally get it. LOL.
So, basically before sewing, the widest "open" end of the headrest will be facing UP and matching right along the top seam of the bodice. The headrest will be (right sides to, with microfiber quilted between) down inside (between) the 2 layers of your bodice. The bodice layers should be RIGHT SIDES TOGETHER and if you pin the two layers of the bodice and the open end of the headrest together, you can peek inside from the BOTTOM of the bodice and see that the right side of the OUTER bodice is touching the right side of the OUTER headrest... and the right side of the INNER LINING of the bodice is touching the right side of the INNER LINING Of the quilted headrest. If that is the way it is, you should come out allright in the end. Whew. Serge across the top seam (or sew.) TURN the bodice right side to. The headrest will pop up beautifully, attached! If it doesn't, then rethink your process!
Step 4. SHOULDER STRAPS!
Attaching the shoulder straps is also a bit complicated. Getting the angle correct on them is the tricky part. But if you accomplished the headrest, no fear.... you can do this part too!
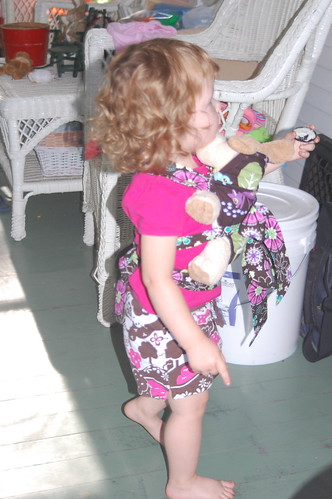
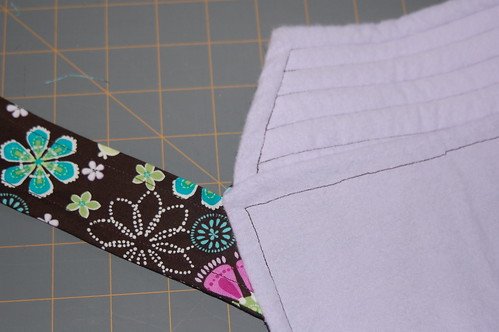
Just like before, the OPEN end of the shoulder straps is going to get sewn into the side seams of the bodice. The best I can do for showing placement is to show you my finished product. I lay the straps out on the table. I paid close attention to the POINTS on the straps. I wanted the softest edge of the straps to lie against my DD's skin, so I put the folded edge (not the sewn edge) towards the headrest. I lay them onto the bodice piece- right sides together-and put them at the angle that I desired. Then I TURNED THE STRAPS INSIDE so that the straps were sandwiched between my bodice pieces. The bodice pieces rightsides together, the straps sandwiched between (just like the headrest was!) and then I pinned the straps in place before sewing/serging. I suggest you do one, then turn it rightside to, then check to see if it's where and how you want it before sewing the second. I also suggest that if you are worried, you BASTE the straps in between the bodice pieces, turn rightside to, and then turn it back and sew or serge it once you are confident. :)
Once you have both sides sewn and the shoulder straps in place, you are almost done! The hard stuff is over!! YAY! All that is left is the bottom of the bodice and waist strap!
I turn the bodice right sides facing out. Then I fold the raw edges under and inside so that the bottom looks finished, and pin. Then I TOPSTITCH the entire bodice, below the headrest and in a perfect square. Bodice FINISHED! hooray!
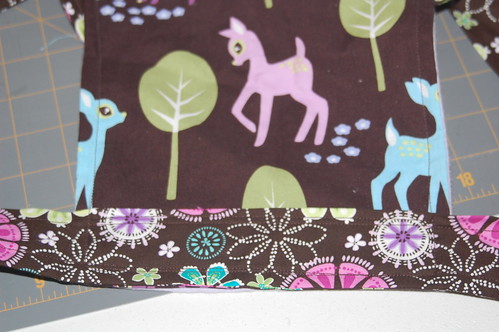
Next for the bottom waist strap. At this point I tried this on DD to make sure that it wasn't too long. you could do this before closing up the bottom, if you are worried about length. I determined how I wanted to attach my waist strap based on how much length I needed. I decided to attach the waist strap OVER the bodice bottom, making the bottom bodice hem and the botton of the waistband fluch with each other. This meant that when I topstitched the bottom waistband strap, I was also attaching the bodice to the waistband in one easy step. (see pic!)
Then I tried it on DD and checked the length of the waist straps. They ended up being perfect, so I just folded the edges inside and topstitched each strap end. I did not do these to a point. Just my preference. there you have it! Feel free to reinforce any stitching that you feel might need to be stronger!
Hope this helps someone who wants to make one, and if I make another in the future, I will take pics and update this tutorial!
2 comments:
this is fabulous ... if only I knew how to sew. lol
love the oreo comment!
Thanks so much for this tutorial. I'm a beginner sewer and I managed to follow your instructions pretty well. The only problem I had was getting the shoulder straps angle right but once I made the mistake I easily fixed it! I'm so pleased with the result! Thanks again!!
Post a Comment