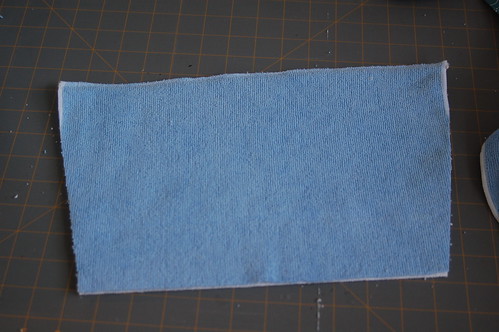
Um, Hello? Dummy. Make your own? I have a whole BIN of microfiber towels that I keep around for absorbency in diapers and trainers. I bought a HUGE PACK at Wal-Mart for like $10-12... or something (it's been a while, check the automotive department)
So since they are supposed to be washed all alone and all special-like (which I long ago gave up on, who has TIME For that with two kids and cloth diapers?) I always find that it's time to mop (like YESTERDAY) and the pads are both dirty. Argh. So today, faced with that exact situation, I decided was THE DAY to sew one. Why not? Let's see what happens. And this time I actually took pictures as I went along. Now, these could be made many ways. I am far from perfect, and I could already see millions of ways to get more fancy with them. But seriously, I'm going to drag it across a filthy floor. I just want it to work. It doens't have to be PERFECT. This took me less than 10 minutes to make, and I used things that I already had around, the thread that was already on my sewing machine and serger (don't be afraid, you don't need a serger, but it makes it much quicker.) and there I have it. A microfiber pad that probably cost me less than $1.
Here goes.
Take two microfiber towels and lay them on top of each other. Serge one end. I purposely made a blue and a white together, with the plan of putting the velcro on the white side and putting the blue side down to the floor.... because the pack comes with both blue and white and I thought it made more sense to have the blue side filthy. Whatever....
Trace around your current microfiber pad and make yourself a template. I use tracing paper, scrap paper, brown grocery bags, recycled cardboard, whatever you have around. I gave it an extra 1/2" on all sides, because they tend to shrink with more washings and because I wanted seam allowances. Okay, so you have two towels serged together on one side, like so. (it's hard to see in the pic, but mine are serged together on the left)

Then lay your template over the top of the pads, and use your straight edge and rotary cutter, or your scissors, and trim the towel down to match the template.

The serged edge that you have already sewn will be the "top" or the longer edge of the microfiber pad.

Roughly, there you have it. Do not discard the piece of microfiber that was cut off, because we are going to use it as extra absorbency in the core of the pad (ohhhhh yeah!)

Now Serge each angled side of the pad, like so. Then take the "extra pieces" and cut them so that they are angled on the sides, just a tad bit shorter in width than the pad itself. The goal here is to put the smaller pieces INSIDE the pad itself, and "quilt" it for extra absorbency. Once you have those two small pieces trimmed so that they will fit inside, serge or sew each angled edge together so that they won't shift. No need to do the longer sides.
Here are the pieces before I trimmed them:

Here they are serged:

At this point in time I decided to Turn the original pad so the serging was inside. Not sure why. Not sure if I would do that again or just leave it, but, whatever. So I inserted the smaller absorbent pads into the bigger pad and centered them. Then I used my sewing machine and just straight stitched the length of the oad, catching the outer edges of the extra absorbency, and once down the center of those two stitches, much like quilting. Then I serged the open end of the pad shut. Now you could also topstitch the whole thing, but that's kinda a waste of time and resources, if I could have just left the serged edges out. So now I just took a couple pieces of Diaper velcro (I had 1" on hand) and sewed two strips of velcro on the white side. And, I have, microfiber steam mop pad. Voila!

Eat your heart out Monster!

2 comments:
You RRAAWWWKKK! Think of all the $$$ you are saving! Totally awesome.
Thanks for the info. The inserting the leftover fabric to insert was a great idea! I have a Haan steam mop and the it has 15 steam jets down the center. I think I will cut my inner (leftovers) fabric and put it on either side of the row of steam jets. That way I won't be restricting the steam. Great job! You gave me some good ideas and my creative juices are now flowing!
Post a Comment